Showing posts with label heat embossing. Show all posts

Tuesday, August 16, 2016

Stampin' Up! ~ Golden Ornaments

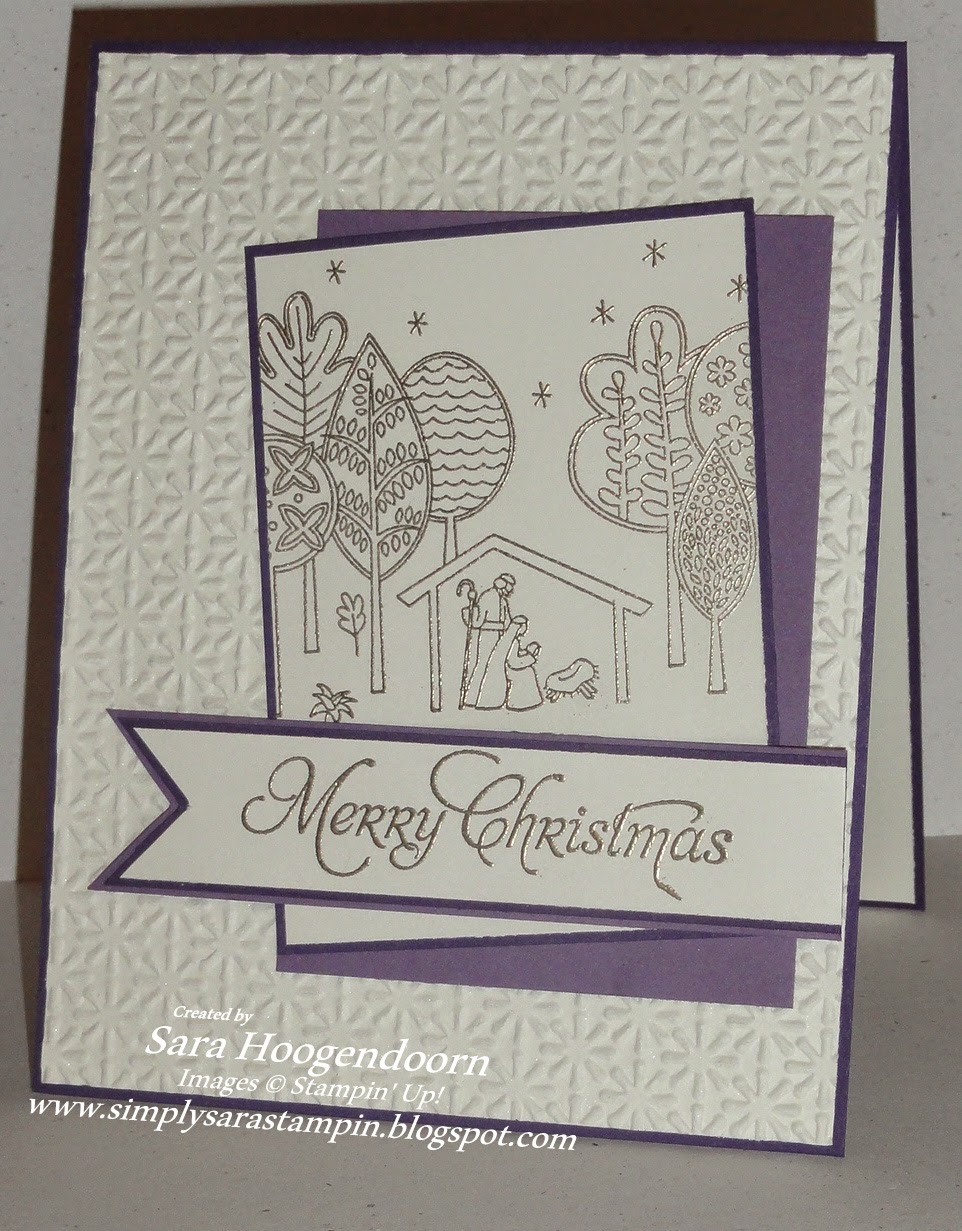
I've been working on my Christmas cards lately and used this week's sketch at Try Stampin' or Not on Tuesday to create today's card.  It was a fun and easy sketch for sure, although taking pictures of the embossed gold was not nearly as easy!  I did some light and dark backgrounds trying to get decent pics!  


Along with this week's sketch is an optional technique: paper tearing.  I tore the edge of the card stock, then dragged it through my Versa Mark pad so I could emboss the edge of it gold.  It never really melted like it normally does, but didn't flake off either.  I was afraid if I heated it much more I was going to start my card stock on fire! lol  Make sure you head over to the Try Stampin's blog HERE to check out all the great cards made using this sketch.  We'd love to see what you create if you get a chance to play along. :)


I guess I can't add my color squares like I usually do since it will just show Whisper White and that would be pretty boring! lol


Thanks for looking and have a great day!
Sara

I would love to be your demonstrator! If you like what you see and want to order anything just click on any of the products that I've listed at the bottom of my blog or click on the "Shop Now" tab at the top of my blog. Any of them will take you directly to my website! If you have questions feel free to contact me. Just click "Contact Me" at the top of my blog . If you're thinking of becoming a demonstrator click "Join My Team". I'd love to have you join me!

Supplies used on this card:

retired ornament punch

(both stamp sets are retired also)

Wednesday, May 4, 2016

Stampin' Up! ~ Remarkable You in Watercolor

Today's card is a soft watercolor that I made for my mother-in-law's birthday that we celebrated while we were in Tennessee.  It had been a bit since I had done a watercolor so I had to give it a try again.


I used the stamp set Remarkable You and stamped the flower and leaves with VersaMark, then the ink color that I wanted the outside to be.  I quickly put clear embossing powder over what I had just stamped and used my heat gun to melt it.


I used an aqua painter to color in the petals.  I wet a petal or leaf one at a time, grabbed some ink and put it on starting where I wanted it to be the darkest, then let the ink spread on it's own since the whole petal or leaf was wet.


Thanks for looking and have a great day!
Sara

I would love to be your demonstrator! If you like what you see and want to order anything just click on any of the products that I've listed at the bottom of my blog or click on the "Shop Now" tab at the top of my blog. Any of them will take you directly to my website! If you have questions feel free to contact me. Just click "Contact Me" at the top of my blog . If you're thinking of becoming a demonstrator click "Join My Team". I'd love to have you join me!

Supplies used on this card:

Watercolor paper from local craft store


Wednesday, March 30, 2016

Butterfly Basics Birthday

I had fun creating this card a few days ago for my sister-in-law's birthday  Since I love to watercolor and the watercolor on this card was very simple to do I had to give it a try along with all the other techniques involved in this card.  I was inspired by Sandi's card HERE and she was kind enough to make a video of it!  I didn't want to copy what she created so I pulled out a whole different stamp set and got busy.


Some of the techniques used on this card are watercolor, sponging, heat embossing, bleaching and using mixed media (kind of I think). There might be more, but that's all I can think of right now. ;)


I "kind of" used all of these colors on my card.  The watercolor paper I use is more cream than white so I put Very Vanilla.  I heat embossed a few things in white, and you can tell I used Soft Suede and Basic Black card stock and ink.


Thanks for looking and have a great day!
Sara

I would love to be your demonstrator! If you like what you see and want to order anything just click on any of the products that I've listed at the bottom of my blog or click on the "Shop Now" tab at the top of my blog. Any of them will take you directly to my website! If you have questions feel free to contact me. Just click "Contact Me" at the top of my blog . If you're thinking of becoming a demonstrator click "Join My Team". I'd love to have you join me!

Supplies used on this card:

A small amount of bleach

Thursday, February 25, 2016

Awesomely Artistic Birthday


This morning I've been staying toasty warm in my basement by the wood stove after the snow storm that decided to hit Michigan.  I thought I'd wake up to it still snowing like crazy, but so far just dark and gloomy clouds off to the south.  We'll see if we get more or not.  Since it's just above freezing and is only supposed to warm up it won't last for long, but it's sure going to leave a mess behind!  That mess always makes way to spring...eventually!  And that's what this card reminds me of.  Not of the mess, but spring! Not sure why I chose just blue and green for this card, but that's what popped into my mind while I was creating it.  I hope my friend didn't mind the colors. :)  


I started by embossing the bundle of flowers in white, then filling them in with color.  I stamped the green fern piece in three spots, then stamped over them with VersaMark and embossed them in white.  I stamped the sentiment, then did a watercolor wash over the card, most of it in blue.  Wherever you see the green I managed to pull it out of the leaves a little since I needed to put some color in between the flowers and leaves too.


Oh, I forgot to add that I used liquid frisket on the top of my card before I did the watercolor wash.  When I rubbed it all off, it left a few splotches of white here and there.  I thought I had put more on than that, but I think it turned out fine.


Thanks for looking and have a great day!
Sara

I would love to be your demonstrator! If you like what you see and want to order anything just click on any of the products that I've listed at the bottom of my blog or click on the "Shop Now" tab at the top of my blog. Any of them will take you directly to my website! If you have questions feel free to contact me. Just click "Contact Me" at the top of my blog . If you're thinking of becoming a demonstrator click "Join My Team". I'd love to have you join me!

Supplies used on this card:


Monday, February 15, 2016

Joyful Christmas

Today I have a couple of Christmas cards to show you that were inspired by the colors over at 52 Christmas Card Throwdown challenge...blue, cream and gold.  I didn't use the bright blue because I don't have a color quite like that so I pulled out my Island Indigo since I haven't used it in a while.  I also looked through all of my Christmas stamps and decided to use the retired set Joyful Christmas.  I haven't used it in a while either and thought the colors and set would make a couple of nice Christmas cards.


I was going to make two of the same cards, but after making the first one I had another idea pop into my head so it's two different cards using the same colors.  They were pretty simple to make other than the fussy cutting and even that didn't take too long.  I stamped 3 leaves on Island Indigo with VersaMark, covered them in gold embossing powder, used my heat gun and cut them out.  I did the same with the "flower" petals on Very Vanilla.  I colored my pearls with a Blendabilities marker that happened to be just the color I needed (not sure what color it actually was though!).  I attached the flower with dimensionals and the leaves with glue dots. 

Thanks for looking and have a great day!
Sara

I would love to be your demonstrator! If you like what you see and want to order anything just click on any of the products that I've listed at the bottom of my blog or click on the "Shop Now" tab at the top of my blog. Any of them will take you directly to my website! If you have questions feel free to contact me. Just click "Contact Me" at the top of my blog . If you're thinking of becoming a demonstrator click "Join My Team". I'd love to have you join me!

Supplies used on this card:

Retired set:  Joyful Tidings
Retired Blendibilities Marker

Built for Free Using: My Stampin Blog

Sunday, January 24, 2016

Birthday Blooms in Watercolor

I finally had a chance to sit down and use a new set from the Occasions catalog called Birthday Blooms.  It's a beautiful flower that was begging to be colored so that's what I did. :)


I embossed it with silver embossing powder on watercolor paper, then watercolored everything using Mossy Meadow for the leaves and Blackberry Bliss for the flowers.  I can't say I love the bottom part of the card, but I needed to put something there and was in a hurry to get the card ready to be mailed since I was a little late sending it out. 


Thanks for looking and have a great day!
Sara

I would love to be your demonstrator! If you like what you see and want to order anything just click on any of the products that I've listed at the bottom of my blog or click on the "Shop Now" tab at the top of my blog. Any of them will take you directly to my website! If you have questions feel free to contact me. Just click "Contact Me" at the top of my blog . If you're thinking of becoming a demonstrator click "Join My Team". I'd love to have you join me!

Supplies used on this card:

Built for Free Using: My Stampin Blog


Thursday, December 3, 2015

Thinking of You at Christmas

So how are your Christmas cards coming?  I hope better than mine are since I really have no idea if I have enough or not! lol  I'm just trying to figure out when I'm going to get the time to sit down and get them all ready to mail out!  I guess I'll manage since I always do.  I'm just glad I'm a part of the design team at 'Tis the Season since I know I have a good chunk ready to go...whew!  Speaking of 'Tis the Season we are having our last challenge of the year and it's inspiration challenge #56!  I love how this card turned out, but I sure can tell you I won't being doing this one three more times!  What was I thinking?!?!


I love this picture and I was inspired by the gold, red and green as you can tell by my card.  Make sure you head over to 'Tis the Season HERE to see how the other designers were inspired by this photo.  If you get a chance we'd love to have you play along too.


Even though my card is a CAS card it wasn't simple to make.  Actually it wasn't difficult, it was just time consuming!!  I used Stampin' Ups! Delicate Ornaments Thinlits Dies and cut one out of Whisper White, another out of Cherry Cobbler and the last one out of Garden Green.  I then used VersaMark and stamped it all over the Whisper White ornament, covered it with gold embossing powder and of course used the heat gun on it.  Then I cut out a solid ornament in Whisper White with that same shape, covered the whole piece with Stampin' Glue Stick and put the gold ornament over the top of the white solid ornament.  The next part is what took SO long!  I popped out the pieces of the red and green ornament and put them into the gold ornament and they would stick because of the glue stick on the solid white ornament piece underneath.  I started from the middle and worked my way out deciding as I went along what color I would put in next.  I did NOT punch all the little pieces out of the red and green ornaments right away, but instead took the ones I needed for the color I was working on.  That means I only popped out between two and four at a time.  Have fun figuring out that puzzle if you pop them all out at once! lol  


Thanks for looking and have a great day!
Sara

I would love to be your demonstrator! If you like what you see and want to order anything just click on any of the products that I've listed at the bottom of my blog or click on the "Shop Now" tab at the top of my blog. Any of them will take you directly to my website! If you have questions feel free to contact me. Just click "Contact Me" at the top of my blog . If you're thinking of becoming a demonstrator click "Join My Team". I'd love to have you join me!

Supplies used on this card:

Tweezers!

Built for Free Using: My Stampin Blog

Wednesday, November 11, 2015

Watercolor Inspiration

Do you ever look at other peoples' cards and just get inspired?  I'm sure most of us have and that's what today's post is all about for me.  I  needed both a birthday and an anniversary card and  had just happened to be looking at a bunch of cards by Birgit.  The first card in her post HERE definitely inspired me.  Fascinating colors to be using together.  I grabbed a few of my ink pads, watercolor paper, aqua painters and went to work.  Two cards, same colors, totally different looks.  That's what so fun with watercoloring...you never know what you're going to get.  Her cards are just wonderful, especially if you're looking for a watercolored look.  Plus they are so clean and simple.  She sure makes water coloring look easy doesn't she?  


The first card I made into a birthday card.  I taped off the edges on this card and after I stamped and embossed the trees I did add more color on.  I didn't want the trees to look like they were floating around on the paper. lol


The anniversary card was a little more flexible as you can see! lol  It just did not want to stay straight, but flop all over when I was taking picutres.  It's hard to see here, but the water colored piece is actually framed and popped up with dimensionals.  I definitely added more color after I embossed these trees because they really looked like they were floating! lol  I guess that's the fun with water coloring.  You can change things up a little if you're careful. :)


Thanks for looking and have a great day!
Sara

I would love to be your demonstrator! If you like what you see and want to order anything just click on any of the products that I've listed at the bottom of my blog or click on the "Shop Now" tab at the top of my blog. Any of them will take you directly to my website! If you have questions feel free to contact me. Just click "Contact Me" at the top of my blog . If you're thinking of becoming a demonstrator click "Join My Team". I'd love to have you join me!

Supplies used on this card:

Built for Free Using: My Stampin Blog

Tuesday, October 13, 2015

I'd Fall for You All Over Again...

Today I have another fall card for you.  I'm sure I've said this before, but I'll say it again...I love making fall cards!  I love the colors, the season and I don't get to make them very often which I think makes me love it when I feel like I can. :)   Plus that's what it's all about over at Try Stampin' on Tuesday.  A fun sketch and an autumn theme.


This is the sketch that we're playing with for this challenge and if you click HERE you can see what all of the other designers created too.  If you get a chance, play along with us.  We'd love to see what you create!


I have to be honest that I was not too sure about this card since I had just created another card using this set right before this card and I loved it!  When I get two thumbs up from family though that helps. :)  So I went with it instead of going back to the drawing board.


Thanks for looking and have a great day!
Sara

I would love to be your demonstrator! If you like what you see and want to order anything just click on any of the products that I've listed at the bottom of my blog or click on the "Shop Now" tab at the top of my blog. Any of them will take you directly to my website! If you have questions feel free to contact me. Just click "Contact Me" at the top of my blog . If you're thinking of becoming a demonstrator click "Join My Team". I'd love to have you join me!

Supplies used on this card:

Retired Stamp Set:  Express Yourself
Retired Punch:  Postage Stamp

Built for Free Using: My Stampin Blog

Thursday, July 23, 2015

Evergreen in Pink

Today I have a fun Christmas card for you that I hope you'll enjoy.  I used Pool Party and Pink Pirouette to create a soft winter scene on this week's card for 'Tis the Season's inspiration challenge.  The first cards I made up just did NOT work.  I pulled the ornaments I made off the cards and used another stamp set to create baby cards.  They turned out really cute, but I forgot to take pics of them.  Maybe I'll post them next week sometime after I get home from this year's Stampin' Up! convention. :)


To create this card I stamped my trees in VersaMark, then Pink Pirouette and poured clear embossing powder on them.  Once I heated them I sponged both on the top and the bottom in Pool Party.  On the top I punched out a circle so I could have a shimmering moon effect.  I sponged lightly around the moon, then worked my way from the outer edges in toward the moon always starting on the edges and moving in so those parts got darker and it stayed a bit lighter the closer I got to the moon.


To create the "hills" on the bottom I used scrap paper and moved it around and sponged in different areas to get the hilly look.


Make sure you head over to 'Tis the Season HERE to check out the other great cards that were inspired by this challenge.  Come play along if you have time.  We'd love to see what you create!


Thanks for looking and have a great day!
Sara

I would love to be your demonstrator! If you like what you see and want to order anything just click on any of the products that I've listed at the bottom of my blog or click on the "Shop Now" tab at the top of my blog. Any of them will take you directly to my website! If you have questions feel free to contact me. Just click "Contact Me" at the top of my blog . If you're thinking of becoming a demonstrator click "Join My Team". I'd love to have you join me!

Supplies used on this card:

Built for Free Using: My Stampin Blog

Thursday, April 30, 2015

Silver Snowflakes

Who's ready for Christmas?  Not me! lol  I sure am willing to work on Christmas cards though so I don't need to do them at the last minute.  For the next two weeks we have an inspiration challenge for you over at 'Tis the Season.  I liked the simplicity of our inspirational photo and how each of the designers had a different twist on what inspired them.


Head over to 'Tis the Season HERE to check out all the great Christmas cards made by each of the designers.  Then show us what you've been inspired to create.  We'd love to see it!


I made my card pretty clean and simple by stamping everything with VersaMark ink, then embossing it all in silver.  I used Silver Encore ink around the edges of my banner.  And to finish it off I placed rhinestone jewels on the middle of each of the snowflakes.  Pretty and simple was what I was looking for this time around and I was happy with the finished cards. :)


Thanks for looking and have a great day!
Sara

I would love to be your demonstrator! If you like what you see and want to order anything just click on any of the products that I've listed or click on the "Shop Now" tab at the top of my blog. Any of them will take you directly to my website! If you have questions feel free to contact me. Just click "Contact Me" right at the top of my blog under the header. If you're thinking of becoming a demonstrator click "Join My Team". I'd love to have you join me!


Thursday, April 2, 2015

Silver Stars

We finally had some warmer weather here in my part of Michigan yesterday!  It was around 65 degrees.  After this past winter it seemed pretty warm to me.  I even had my office door open to let in the sunshine and warmth. :)  Seems kind of strange that I'd be making a Christmas card with this kind of weather, but it's time for another challenge over at 'Tis the Season and this time it's a color challenge.  I thought it was going to be a difficult one again, but I think I managed to do ok with it. :)


I used the colors Pacific Point, Soft Sky and Night of Navy.  I heat embossed to get my silver.  As you can see I did just a touch of each of the colors and let silver be the focus of the card.  I'd still like to make a few more and have the base be Soft Sky on one and Pacific Point for the other.  The last one will be the one I like the best out of the three. :)


Make sure you head over to 'Tis the Season to check out all the other great cards by the design team and to play along too.  You need to make your Christmas cards at some point and getting them started sooner rather than later will make you happy when December comes creeping up on you! lol


Thanks for looking and have a great day!
Sara

I would love to be your demonstrator! If you like what you see and want to order anything just click on any of the boxes above. It will take you directly to my website! If you have questions feel free to contact me. Just click "Contact Me" right at the top of my blog under the header. If you're thinking of becoming a demonstrator click "Join My Team". I'd love to have you join me!

Supplies used on this card:


Built for Free Using: My Stampin Blog


Thursday, March 5, 2015

Merry Christmas Newborn King

Yes, I have another Christmas card to share with you today. :)  We have a fun sketch for you to play along with at 'Tis the Season Christmas card challenge.  I kept this card pretty clean and simple and used some purples since I haven't been using those colors at all lately.


Head on over to 'Tis the Season HERE to check out all the other great Christmas cards created by the designers using this sketch and if you get a chance make sure you play along too.  Christmas will be here before you know it and it will be nice to have a stash of Christmas cards on hand! 


I feel like this year I'll get a lot of use out of all of the different Christmas stamp sets I bought from the Stampin' Up holiday catalog last year.  I've got plenty of time and I'm curious to see what I'll create throughout the year.


Thanks for looking and have a great day!
Sara

I would love to be your demonstrator! If you like what you see and want to order anything just click on any of the boxes above. It will take you directly to my website! If you have questions feel free to contact me. Just click "Contact Me" right at the top of my blog under the header. If you're thinking of becoming a demonstrator click "Join My Team". I'd love to have you join me!

Supplies used on this card:

Built for Free Using: My Stampin Blog


Thursday, January 22, 2015

Christmas Wishes

I have another fun card for you and since it's still winter out it might not seem too bad.  Yes, it's another Christmas card, but it could be a winter birthday or thinking of you card too. :)  I made this card for the next 'Tis the Season challenge and this week it's a sketch challenge.  


You need to check out all the other cards made using this sketch HERE at 'Tis the Season.  They are all so different, but so fun!!  Play along with us too if you get that chance.  You'll be glad you did when you have your Christmas stash finished in plenty of time to send them out for Christmas.  Trust me...that's what I did and it was wonderful! :)


Believe it or not I really did incorporate the sketch on my card.  After I stamped the tree from the set Sheltering Tree I used the group of snowflakes from the set Holiday Home and stamped those before the rest of the snowflakes using a stamp from the set Gorgeous Grunge.  The snowflakes and tree are all stamped with VersaMark and embossed with White Stampin' Emboss powder.  Then I brayered over the embossed images first in Coastal Cabana, then Island Indigo, next Pacific Point and finally Night of Navy.  I spritzed it all with Vanilla Shimmer Smooch Spritz (mixed with rubbing alcohol) to give it a shimmer effect and it cleans all the ink of the parts of the card that were embossed in white.  The last thing I stamped was "Christmas" using Night of Navy on the bottom of the brayered sheet, then embossed more snowflakes and "wishes" on the bottom of a piece of Night of Navy.


Thanks for looking and have a great day!
Sara

Supplies used on this card:

retired snowflake embossing folder

Built for Free Using: My Stampin Blog