Showing posts with label Christmas. Show all posts

Tuesday, October 10, 2017

Poinsettia Burst ~ A Fun Stampers Journey Card

Today's card is inspired by Try Stampin' or Not on Tuesday's sketch challenge #343.  
The optional theme is Leaves.  I think it was meant for fall leaves, but since I was working on a bunch of Christmas cards this weekend this is what I came up with. :)

Tuesday, June 13, 2017

RG Presents Journey Holidays Reminder

Just a quick reminder that you have until June 19 to sign up for RG Presents Journey Holidays at the discount price of $75!  It goes up to $99 from June 20-June 26.  This is a fun filled event where Richard will share sneak peeks for the Holiday Mini catalog coming out in August!  

You will receive two stamp sets, two die sets, four card kits and a surprise bag from FSJ (you can see everything below).  I would love to have you join me for the day!


To register go to my website www.funstampersjourney.com/sarahoogendoorn.  Click on the "Shop" button, then in the search box type BD-0325 and enter.  RG Presents Journey Holidays will pop up and you need to click on the link.  After that you just need to go through your ordering process.  If you need help or have any questions please let me know!

Thanks for looking and have a great day!
Sara

I would love to be your Journey Coach! If you are thinking about joining 
Fun Stampers Journey and would like to be a Journey Coach click 
"Join My Team". 
I'd love to have you join me on my journey!  

If you like what you see and want to order just click on the 
"Shop Now" tab at the top of my blog. 

 If you have questions feel free to contact me. 
Just click "Contact Me" at the top of my blog . 

Supplies used on this card

Sunday, December 25, 2016

Merry Christmas! A Fun Stampers Journey Card

Merry Christmas!  I hope you have all had a great day spending time with family and friends.  I know that I have.  As Christmas day 2016 is about to close for me I have one final Christmas card to share with you.  This is always a special card for me to make because my dad asks me to make a card for my mom that he can give her on Christmas day.  Since her favorite color is blue I always make that the dominant color.


This was another card that was hard to get a good picture of!  The watercolor is a bit more vibrant and the embossed notes aren't gray or super shiny like the pictures show.   My dad and mom both liked it so that's all that matters. :)  


I started by stamping Vintage Notes on watercolor paper using Clear Pigment Ink and embossing it with Journey Silver Embossing Powder.  However before I used my heat gun I used a kleenex to randomly wipe off some of the embossing powder.  I wanted the background to be there, but not be the dominant focal point.  Next I used my Color Splash watercolor pencils to create a colorful background.  After that I stamped two trees from the set Winter Holiday using a Journey Silver ink pad.  Have you seen all the snowflakes I've been putting on my Christmas cards lately?  I'm now down to just a few left.  A couple of these are a lot smaller than the snowflakes I earned for free as a Bloom Benefit.  That's because I broke a few of them when I was a little heavy handed and in a hurry putting them on other cards.  Did I throw them away?  NO WAY! lol  I broke the other parts of the snowflake off and made mini snowflakes! :D  


Thanks for looking and have a great day!
Sara

I would love to be your Journey Coach! If you are thinking about joining 
Fun Stampers Journey and would like to be a Journey Coach click 
"Join My Team". 
I'd love to have you join me on my journey!  

If you like what you see and want to order just click on the 
"Shop Now" tab at the top of my blog. 

 If you have questions feel free to contact me. 
Just click "Contact Me" at the top of my blog . 

Supplies used on this card


Stamp Sets:
Vintage Notes & Winter Holiday
Card Stock:
Pool Play, Brushed Silver, Whip Cream, Watercolor Paper
Ink Pads:
Clear Pigment Ink, Journey Silver
Supplies:
Color Splash Watercolor Pencils, Journey Silver Embossing Powder,
Pretty Flakes Accents, Cut Rhinestones

Tuesday, December 20, 2016

Tag Elements ~ A Fun Stampers Journey Christmas Card

Oops!!  I forgot to post today's card for Try Stampin' or Not on Tuesday's sketch challenge.  I loved the sketch we had to work with and used some supplies that I've used on a few other cards I've made lately.


This was a hard card to get a good picture of since the snowflakes have sparkles, the white paper is shimmery and so is the silver paper!


Make sure you check out all the other great cards made with this week's sketch HERE .  So fun to see how everyone else thinks and creates. :)  If you get a chance make sure you play along too.  We'd love to see what you create!


See the difference in these two pics?  Now use your imagination and pretend it's not quite as shimmery and shiny as the top, but not as dull as the bottom. :)


Thanks for looking and have a great day!
Sara

I would love to be your Journey Coach! If you are thinking about joining 
Fun Stampers Journey and would like to be a Journey Coach click 
"Join My Team". 
I'd love to have you join me on my journey!  

If you like what you see and want to order just click on the 
"Shop Now" tab at the top of my blog. 

 If you have questions feel free to contact me. 
Just click "Contact Me" at the top of my blog . 

Supplies used on this card


Stamp Sets:
Tag Elements
Card Stock:
Pearl and Brushed Silver
Ink Pads:
Journey Silver
Supplies:
Oval Dies, Pretty Flakes Accents

Thursday, December 15, 2016

Sentimental Prints Christmas Thank You ~ A Fun Stampers Journey Card

It's that time of year...time to write some thank yous!  My hubby works for the USPS as a rural mail carrier.  Let's just say that he is BUSY (has been since September) and when people take the time to give him a gift on his mail route he really appreciates it!  And the ever loving wife that I am (who also happens to makes cards) has to help him out with that right?  Plus I get the benefit of all of his goodies too so I suppose I can sacrifice a little! ;)  Every year I whip up a handful of cards and for the past few years I've been making 3x3 cards.  


I just can't resist the Bloom Benefits called Pretty Flakes Accents!  I LOVE these snowflakes, so it's a good thing I earned a LOT of them!  I actually had enough to put them on my hot chocolate project from my November open house, on two sets of stamp a stack cards for December and all of these 3x3 cards.  Love that I get Bloom Benefits for every $50 that I spend with Fun Stampers Journey! :)


I think I made about 47 of these small cards.  Usually I have a LOT of gifts on hand before I get them done, but this year I've been ahead of the game...yea me! :)  

Thanks for looking and have a great day!
Sara

I would love to be your Journey Coach! If you are thinking about joining 
Fun Stampers Journey and would like to be a Journey Coach click 
"Join My Team". 
I'd love to have you join me on my journey!  

If you like what you see and want to order just click on the 
"Shop Now" tab at the top of my blog. 

 If you have questions feel free to contact me. 
Just click "Contact Me" at the top of my blog . 

Supplies used on this card


Stamp Sets:
Sentimental Prints
Card Stock:
Specialty Paper Pearled Basics & Journey Brush Silver
Ink Pads:
Journey Silver
Supplies:
Bloom Benefit - Pretty Flakes Accents, Journey Silver Silk, 
Cut Rhinestones & Journey Glue Dots

Monday, December 12, 2016

Frosty Fun ~ A Fun Stampers Journey Card

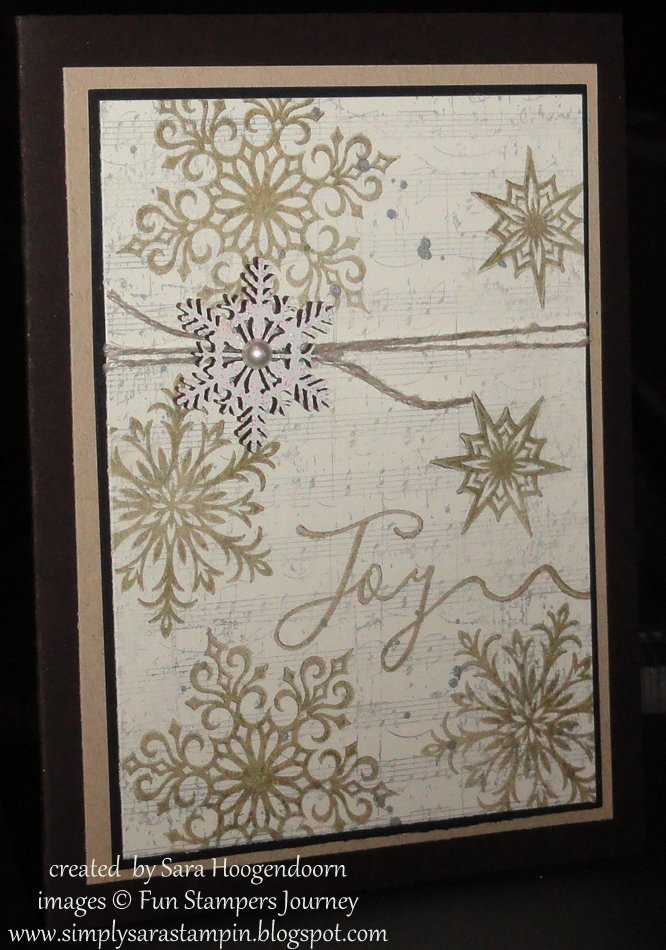
Are snowflakes blue?  Nope! But they are on today's card!  
This is another  December stamp a stack a card that I prepped for my ladies to make. :)


Who doesn't love a cute snowman?  And it can be a card for Christmas or someone's birthday...or a thank you or thinking of you.  Maybe a just because too.  Yup, it could be a card for a lot of occasions. :)


It looks like I layered four pieces of card stock, but I only have two layers plus a frame.  I popped up one of the frames, but you can't tell it in any of the pictures.


This was a pretty easy card to make!  I stamped the snowman using Black Licorice, blocked off the bottom part of the snowman so I could sponge a hill, stamped the snowflakes using Beach Ball, colored in the scarf and holly on the hat with reinkers and a blending brush, then assembled my card...whew, that was a long sentence! I also put on the pearls and stamped the sentiment on the front and one inside the card.  Easy as that! :) 


Thanks for looking and have a great day!
Sara

I would love to be your Journey Coach! If you are thinking about joining 
Fun Stampers Journey and would like to be a Journey Coach click 
"Join My Team". 
I'd love to have you join me on my journey!  

If you like what you see and want to order just click on the 
"Shop Now" tab at the top of my blog. 

 If you have questions feel free to contact me. 
Just click "Contact Me" at the top of my blog . 

Supplies used on this card


Stamp Sets:
Frosty Fun & Every Day
Card Stock:
Beach Ball, Beach Breeze & Whip Cream
Ink Pads:
Beach Ball & Black Licorice
Supplies:
Sponges, Blending Brush, reinkers, pearls

Saturday, December 10, 2016

Snow Buddy ~ A Fun Stampers Journey Card

Last week I posted a card with feathers on it and a couple of weeks ago I posted one with leaves on it.  Why am I telling you this?  Because both of those cards and today's cards are all the same card! Yup, the same card stock, just stamped with different images.  How fun is that?  


I needed five winter cards for this month's stamp a stack and I wanted to use something other than blue.  Don't get me wrong I love blue cards, but I needed a change of color.


I stamped the background stamp Vintage Notes lightly with silver, then added the snow flakes in gold with the stamp set snow buddy.  I also added "joy" just in case someone wanted to use it as a Christmas card instead of a winter card.  


For finishing touches I added a bit of silver silk, tied on some natural journey thread, added a snowflake from the bloom benefit Pretty Flakes Accents and pearl in the middle of the snowflake.


Thanks for looking and have a great day!
Sara

I would love to be your Journey Coach! If you are thinking about joining 
Fun Stampers Journey and would like to be a Journey Coach click 
"Join My Team". 
I'd love to have you join me on my journey!  

If you like what you see and want to order just click on the 
"Shop Now" tab at the top of my blog. 

 If you have questions feel free to contact me. 
Just click "Contact Me" at the top of my blog . 

Supplies used on this card


Stamp Sets:
Snow Buddy, Vintage Notes & Holiday Script
Card Stock:
Dark Roast, Oatmeal Cookie, Black Licorice & Buttercream
Ink Pads:
Journey Gold & Journey Silver
Supplies:
Pretty Flakes Accents, Pearls, Naturals Journey Thread

Tuesday, December 6, 2016

Stay Wild - The Peace of Christmas ~ A Fun Stampers Journey Card

I have another card for this week's sketch challenge over at Try Stampin' or Not on Tuesday.  Now this was a fun sketch to work with, but I went a little crazy again and turned that sketch upside down!  


Here's the sketch we had to work with and all I could see was a big ol' moon popping out from behind the mountain even though I was looking at it upside down! lol

Make sure you stop over at Try Stampin' on Tuesday Here and check out all the other cards made by the design team.  So fun to see what everyone else created with the sketch.  If you get a chance make sure you play along.  We'd love to see what you create!


To create this scene I started by stamping a background stamp called Vintage Notes onto Buttercream card stock using the Journey Gold ink pad (I wanted the moon to have something inside of it, so I had to start with what is the farthest in the background and move my way forward...if that makes any sense!).  Then a ripped a piece of scrap paper so I had a mountain shape ripped out.  I sponged the whole mountain with Pretty Amethyst, then added Deep Lilac and sponged from the top of the mountain down, but didn't do about the bottom 1/4 of it.  Last I sponged using the color Pretty Pansy and once again started at the top and sponged down about half way.  Next I cut out a circle for the moon and used the inside of the scrap that I had ripped out of the mountain to cover the mountain up and and the moon so I could sponge over the rest of the card without ruining the mountain that I had already sponged and to make the moon stand out.  I once again started with Pretty Amethyst and sponged over the whole card (except the mountain and moon because they are covered), then added Deep Lilac, but stuck closer to the edges. The last color once again was Pretty Pansy and I just barely touched on the left and right edges, but did the top and corners down a little farther.  I added "peace" over the moon using Deep Lilac and stamped the trees using one of my favorite stamps "Stay Wild".  I stamped that with Deep Lilac as well.  I added three pearls to finish off the card.


Thanks for looking and have a great day!
Sara

I would love to be your Journey Coach! If you are thinking about joining 
Fun Stampers Journey and would like to be a Journey Coach click 
"Join My Team". 
I'd love to have you join me on my journey!  

If you like what you see and want to order just click on the 
"Shop Now" tab at the top of my blog. 

 If you have questions feel free to contact me. 
Just click "Contact Me" at the top of my blog . 

Supplies used on this card are all from Fun Stampers Journey


Stamp Sets:
Stay Wild & Vintage Notes
Card Stock:
Deep Lilac & Buttercream
Ink Pads:
Journey Gold, Pretty Amethyst, Deep Lilac & Pretty Pansy
Supplies:
Pearls & Sponges

Tuesday, October 11, 2016

Snow Globe ~ A Fun Stampers Journey Card

I don't have a lot of Christmas stamps right now, but this one comes from Fun Stampers Journey and was a Bloom Benefit out of their Journey Holiday Mini Catalog that ended in September.  Since we're all about holidays right now over at Try Stampin' or Not on Tuesday I thought the globe would be perfect to use with their sketch. :)


Here is this week's sketch.  Make sure you check out all the other great cards made using it HERE.  We'd love to see what you create if you get a chance to play along!  We're also doing some fun things for the month so make sure you check out what's going on.


You can see lots of shimmer on this picture of the card!  


Not quite as much shimmer on this one, but every picture turned out differently.  To create the sparkling/snowing globe I colored it in with Journey Color Splash watercolor pencils, then used a little bit of glue over the globe and covered it with Journey Sparkle Dust.


Thanks for looking and have a great day!
Sara

I would love to be your Journey Coach! If you are thinking about joining 
Fun Stampers Journey and would like to be a Journey Coach click 
"Join My Team". 
I'd love to have you join me on my journey!  

If you like what you see and want to order just click on the 
"Shop Now" tab at the top of my blog. 

 If you have questions feel free to contact me. 
Just click "Contact Me" at the top of my blog . 

Supplies used on this card:


Stamp Sets:
Snow Globe (retired)
Card Stock:
Cool Pool p. 288 (CS-0018) $6.95
Banana Cream p. 288 (CS-0087) $6.95
Black Licorice p. 289 (CS-0003) $6.95
Whip Cream p. 289 (CS-0040) $6.95
Ink Pads:
Cool Pool p. 288 (IP-0074) $7.95
Black Licorice p. 289 (IP-0041) $7.95

Supplies:
Journey Color Splash Watercolor Pencils p. 28 (JM-0078) $59.95
Journey Sparkle Dust p. 306 (AC-0013) $5.95
Details Pro Shears p. 273 (TO-0063) $13.95

Tuesday, September 27, 2016

Joyful Winter Hills ~ A Fun Stampers Journey Card

Today I have a Christmas card to show you inspired by Try Stampin' - or Not - on Tuesday's sketch challenge #290 and the optional theme is The Holidays are Coming.  I really stretched the sketch again, but I think I do that a lot! lol  


This is the fun sketch I worked with.  Make sure you check out the great cards the other ladies created using this sketch HERE.  


This was actually a pretty easy card to make.  I cut out the trees using the Winter Hills Die.  Then I ripped strips of paper to make some hills.  I sponged around the trees and the "hills" where I ripped the paper using Cool Pool, stacked the paper in layers, trimmed the edges to the size I needed and put it on my Cool Pool card base using foam squares.  I stamped the word Joy from the Holiday Script Bundle and used the Die to cut it out.  I added a few pearls to go with the sketch, but just couldn't come up with something to fit the tab to the left of the trees.


I had cut out the biggest tree using the die and it didn't quite go with the sketch so I put it on the inside instead. :)


Thanks for looking and have a great day!
Sara

I would love to be your Journey Coach! If you are thinking about joining 
Fun Stampers Journey and would like to be a Journey Coach click 
"Join My Team" at the top of my blog. 
I'd love to have you join me on my journey!  

If you like what you see and want to order just click on the 
"Shop Now" tab at the top of my blog. 

 If you have questions feel free to contact me. 
Just click "Contact Me" at the top of my blog . 


Supplies used on this card

Stamp Sets: 
Holiday Script p. 30 (SS-0383) $31.40
 This is the bundle price and it is only available until September 30!!

Card Stock:
Cool Pool p. 288 (CC-0118) $6.95
Whip Cream p. 289 (CC-0040) $6.95
Ink Pads:
Cool Pool p. 288 (IP-0074)
Whip Cream p.289 (IP-0009) $7.95

Supplies:
Holiday Script Die p. 30 (DI-0233) $17.95
This is only available until September 30!
Pearls p. 307 (AC-0024) $3.95
Sponges p. 274 (JM-0014) $4.95


Tuesday, August 16, 2016

Stampin' Up! ~ Golden Ornaments

I've been working on my Christmas cards lately and used this week's sketch at Try Stampin' or Not on Tuesday to create today's card.  It was a fun and easy sketch for sure, although taking pictures of the embossed gold was not nearly as easy!  I did some light and dark backgrounds trying to get decent pics!  


Along with this week's sketch is an optional technique: paper tearing.  I tore the edge of the card stock, then dragged it through my Versa Mark pad so I could emboss the edge of it gold.  It never really melted like it normally does, but didn't flake off either.  I was afraid if I heated it much more I was going to start my card stock on fire! lol  Make sure you head over to the Try Stampin's blog HERE to check out all the great cards made using this sketch.  We'd love to see what you create if you get a chance to play along. :)


I guess I can't add my color squares like I usually do since it will just show Whisper White and that would be pretty boring! lol


Thanks for looking and have a great day!
Sara

I would love to be your demonstrator! If you like what you see and want to order anything just click on any of the products that I've listed at the bottom of my blog or click on the "Shop Now" tab at the top of my blog. Any of them will take you directly to my website! If you have questions feel free to contact me. Just click "Contact Me" at the top of my blog . If you're thinking of becoming a demonstrator click "Join My Team". I'd love to have you join me!

Supplies used on this card:

retired ornament punch

(both stamp sets are retired also)

Tuesday, August 2, 2016

Stampin' Up! ~ Noel

It's been a while since I've posted a Christmas card on my blog.  This week at Try Stampin' or Not on Tuesday we have a fun sketch for you and the optional technique is beading or anything holiday related.  Since I'm a little behind on my Christmas cards I thought I'd work on a few of those.  It's hard to tell in the pictures, but I used gold Wink of Stella on my flowers.  They're so shimmery and pretty in person!  


Here's this week's sketch challenge #282.  Make sure you check out all the other great cards the designers made HERE and play along if you get a chance. We always love to see what you create!


Thanks for looking and have a great day!
Sara

I would love to be your demonstrator! If you like what you see and want to order anything just click on any of the products that I've listed at the bottom of my blog or click on the "Shop Now" tab at the top of my blog. Any of them will take you directly to my website! If you have questions feel free to contact me. Just click "Contact Me" at the top of my blog . If you're thinking of becoming a demonstrator click "Join My Team". I'd love to have you join me!

Supplies used on this card: