Showing posts with label 3-D Projects. Show all posts

Friday, June 10, 2011

Flower Garden Clematis

Today's card is one I've been thinking about for awhile...the flower part of it at least. :)  I love to take pictures of my flowers.  I get more of the same thing every year, and when I was taking a picture of my clematis flowers I though to myself "Why not try and make one of these to put on a card?"  So I did!  I love the design for this weeks Mojo Monday and thought the flower would go perfectly on it. :)  I also made this card for a fellow stamping friend whose b-day happens to be today.  We'll see if she sees this post before she gets her card later tonight. ;)  So first off is a picture of one the the flowers that gave me my inspiration...


And here's a picture of the card


...and the flower up close.  I know...flowers don't have all the sparkles like that, but I love the look of it and couldn't resist putting it on. :)


Thanks for looking and have a great day!

Stamp Set:  Vintage Labels
Card Stock:  Rich Razzleberry, Pretty in Pink, Pink Piroutte, Wild Wasabi & Whisper White
Classic Stampin' Pads:  Rich Razzleberry & Garden Green
Punches:  Blossom Petals (Used large leaf for petals), 1" Circle Punch & 1 3/4" x 7/8" Oval
Embossing Folder:  Elegant Bouquet
Shimmer Paint:  Champagne Mist


Instructions on how to make the flower...will be coming in a day or two. ;)  I have another card I'll be making with a similar flower.  Plus, I learned what to do, and what not to do on this flower and "perfected" it on my second one. ;)


Thursday, May 19, 2011

Gerbera Thank You

Every Christmas my husband gets a bunch of gifts from people on his mail route, and I always make Christmas thank yous for those that give gifts.  I'm sorry to say I haven't been giving out a thank you to one family on his route because we always get our gift in the spring...a gift certificate. They own some greenhouses and that's where we buy all of our flowers for our yard.  I was determined to not forget them this year!  I wanted to make a thank you with a gerbera daisy on it.  So when I saw Stamping 411 challenge 203 I thought it would be the perfect design to put my flower on!


I used a tutorial from Noel Johnson that I remembered seeing earlier.  Thanks for the inspiration Noel!


Stamp Set:  Thank You Kindly
Card Stock:  Marina Mist, Regal Rose & Whisper White
Classic Stampin' Pad:  Marina Mist
Embossing Folder:  Perfect Polka Dots
Bigz Die:  Flower Daisies #2
Punch:  Modern Label
Ribbon:  5/8" Grosgrain in Regal Rose
Shimmer Paint:  Champagne Mist
Build-A-Brad with Black Stampin' Emboss Powder & Dazzling Diamonds


Wednesday, May 11, 2011

3-D Birthday Card and Gift Box Set

Today's project is similar to one I made a couple of weeks ago, just with different colors.  When I made my first box for a 3-D card I had sitting around, a couple of ladies asked for instructions...so I made this So Saffron box.  I couldn't let it go to waste, now could I?!  That's when I decided to make a band and card to go with the box for a friend at work.  It just happens to go along with this weeks Hand Stamped Sentiments challenge too. :)


I know...I put a lot of pictures on.  I guess I like it when I can see a lot of different angles when I'm looking at cards or projects and I'm hoping anyone else looking does too. :)  To see the instructions for this box click HERE and go to the bottom of the page.

Thanks for looking and have a great day!

Stamp Set:  Afterthoughts
Card Stock:  So Saffron, Pretty in Pink, Wild Wasabi & Whisper White
Classic Stampin' Pads:  So Saffron & Pretty in Pink
Punches:  1 3/4" Scallop Circle, Decorative Label & Boho Blossoms
Sizzlit Die:  Little Leaves
Embossing Folder:  Perfect Polka Dots
Ribbon:  5/8" Grosgrain in Pretty in Pink
Jewels:  Basic Pearls


Friday, April 29, 2011

Card Box

Wow, I'm a little slow this week putting anything on my blog. :(  Yup, it's been a busy week, but I must admit it's nice to take a little break every now and then.  Today I decided to post a "box" instead of my usual card.  I've been seeing a lot of beautiful cards lately that are 3-D...I've even made a few myself.  But I've been wondering how are you suppose to give those kind of cards away?  I don't want to hand a card to someone that's not in an envelope, but they don't fit in them!  I started looking around for tutorials for boxes and figured with all the time I spent looking I could be busy making something.  So that's what I did, and this is what I came up with for a card I made earlier for a challenge.


A picture with the box all set to give away.  Still not sure how I'd mail this though.  You'd think with my husband working for the Post Office I'd have something up my sleeve!


I had to show a picture with the card inside the box.


And finally a close up of the flowers.

Thanks for looking and have a great day!

Here are the instructions for the box.

You will  need two pieces of card stock cut to 8 1/2" x 8 1/2".  

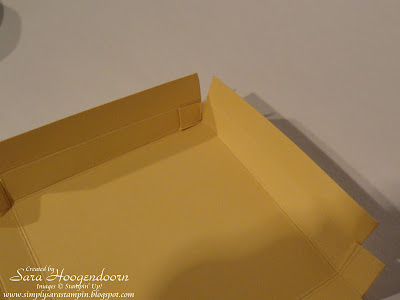
The bottom needs to fit the 5 x 5 card so I want the bottom of the box to measure 5 1/4" x 5 1/4".  I scored my paper at 13/16" all the way around, then I scored it at 1 5/8".  Your card stock should look like this...  Just click on the picture to make it bigger if you can't see the score lines.


Now the top of the box needs to be slightly larger than the bottom to fit over it.  I need that to measure 
5 3/8" x 5 3/8".  I score this one at 25/32" all the way around, then I scored it at 1 9/16".  Your card stock should look like this...


Yes, these are strange measurements, and the score lines look the same, but they are slightly different and do work. :)

Now you need to fold each of the score lines.


Now cut the corners like shown.


Now use sticky strip to adhere your first flap like shown.


Now fold the flap over the corner piece and adhere.  I used two-way tape all the way along the edge for this part.  Once your tape is on, fold the flap over pressing in the middle first and work your way out to each edge making sure it's nice and tight.  


Tuck the next corner in and repeat steps until finished with the top and the bottom of the box.
Here is the finished box.


Monday, April 18, 2011

Easter Basket

Today I decided to try something a little different for two of my challenges. Instead of a card I made a cute little Easter basket. Hand Stamped Sentiments Challenge #63 is an Easter theme this week.  Stampin Celebration Challenge # 48 is also an Easter theme, but I did this challenge for the colors too.  I was hoping to get it posted earlier, but a basket without candy just didn't quite look right!  Well, my hubby has the day off, and as I am writing this he is out picking up the candy for me while braving the snow.  Ok, so it's not a lot, but still, snow on April 18!  I know Michigan can have some weird weather, but this is just crazy!


And here is a lovely picture of the snow outside today...  That's actually our neighbor's barn, but it showed the snow the best.


Thanks for looking and have a great day!  
And remember the real reason for Easter...
The death, burial and resurrection of our Lord and Savior, Jesus Christ. 

Card Stock:  Pink Pirouette, Pretty in Pink, Perfect Plum, So Saffron, 
Wild Wasabi, Marina Mist & Bashful Blue
Classic Stampin' Pads:  Pretty in Pink, Perfect Plum, So Saffron, 
Wild Wasabi, Marina Mist & Bashful Blue
Big Shot Bigz Die:  Fancy Favor
Big Shot Embossing Folders:  Vintage Wallpaper, Square Lattice, 
Elegant Bouquet & Perfect Polka Dots
Punches:  1 3/4" x 7/8" Oval & 1 3/8" x 5/8" Oval

If you click on the picture it should make it bigger so you can see more detail.


Here is a template of the basket I made along with everything used to make it. Just in case you can't read it, you measure 1 1/4" down for the basket.  To make the handle I cut another piece of  paper about 3/4" x 12" and put it on the edge of the Fancy Favor Die where the scallops are, then flipped it over ~ making sure the scallops match ~ and ran it through again.  To make the grass I cut the card stock 2" x 7" so it fits around the front and sides of the basket.  I folded it off center so the back would be longer than the front, ran it through the crimper, sliced it with the scissors, then separated it a little bit so I could chop it at odd angles to make it a little jagged.  I used Sticky Strip on the front and sides (at the very bottom) to attach the grass.  To make the eggs I used the punches listed above and ran them through the embossing folders listed.  For a little extra detail I sponged around all the eggs and the top of the basket and the handle.  To attach the handle just punch a small hole on each side and use a brad of some sort.  I put buttons over my brads because they didn't match, but you can use whatever you have available.  Just slide the eggs in wherever you think they look good and then attach (I used glue dots).


Monday, April 4, 2011

Shadow Box Card

After about a week of sunshine, I'm looking out my window only to see clouds and rain today.  I just have to remember we need the rain as well as the sunshine for things to grow!  At least I don't need the rain and sunshine in my basement to grow flowers for my cards!  Today's "card" is a challenge from Hand Stamped Sentiments.  The challenge was to make a shadow box card.  Making the box took a little extra work, but wasn't as hard as I though it was going to be. :)


Thanks for looking and have a great day!

Card Stock:  Old Olive, Pretty in Pink, Regal Rose, So Saffron
 & Whisper White
Classic Stampin' Pads:  Pretty in Pink, Regal Rose & So Saffron
Big Shot Embossing Folders:  Framed Tulips & Perfect Polka Dots
Big Shot Bigz Dies:  Daisies #2 & Top Note
Punch:  1 3/8" x 5/8" Oval

Thursday, March 10, 2011

Carnations!

A few days ago I said I was going to be making some more carnations, after all they are my favorite flower.  When I saw the The Paper Players challenge to make anything that brings spring to mind I couldn't resist, and the Stamping 411 Challenge was the perfect sketch to use for the idea I had going on in my mind.


Yesterday I also made this little 3x3 thank you for a friend.  


I guess the only downside to these cards is you'd have to mail them in a box!

If you didn't see my other post on how to make carnations and would like to see how, click here.  Oh, before I forget, I did use deckle scissors for these two cards, just to see if I liked it.  I think either way works!

Thanks for looking and have a great day!

5X5 Card
Card Stock:  Perfect Plum, Marina Mist, Wild Wasabi & Whisper white
Classic Stampin' Pads:  Perfect Plum
Big shot Embossing Folder:  Elegant Bouquet
Ribbon:  5/8" Grosgrain in Marina Mist
Jewels:  Basic Pearls
Tools:  Crimper & Paper-Piercing Tool

3X3 Card
Cardstock:  Regal Rose, Garden Green, So Saffron & Whisper White
Classic Stampin' Pads:  Regal Rose
Big Shot Embossing Folder:  Perfect Polka Dots
Punch:  1 3/8" x 5" Oval
Tools:  Crimper & Paper-Piercing Tool

Saturday, February 26, 2011

Petal Cone Die Box

Today's post is another thing I've been thinking about for a few weeks.  At our last Red Hot Stampers meeting our upline, Glenda, had all of us cut out two of the Petal Cone Dies using any color we wanted, and you guessed it....she asked us  to make something out of it.  For some odd reason I chose Always Artichoke ~ don't ask me why~ and now I needed to figure out what to do with it.  Well, that's where these challenges come to the rescue!  I saw challenge 56 from Hand Stamped Sentiments.  It was all about dies, and that's what I was doing.  So I decided to do a box and put some kind of flower on top... 


...but what color  should I use for my flower?  That's where my next challenge, #41 from Stampin' Celebration helped out.  I love the colors they put out there for us to use.  This challenge has shadowing on the table cloth that makes it appear green and the flowers were just the color I needed to go with Always Artichoke.


Thanks to all the ladies out there who put a lot of time and effort into these challenges for us!

I finally came up with this lovely box.  Not sure what kind of flower I would call it, but I think it looks similar to some pictures I've seen of some dahlias, so I'll go with that. :)  


Thanks for looking and have a great day!

Card Stock:  Always Artichoke, Rich Razzleberry & Whisper White
Classic Stampin' Pads:  Rich Razzleberry & So Saffron
Big Shot Dies:  Petal Cone & Daisies Flower #2
Punches:  Boho Blossoms & 1/2" Circle
Ribbon:  5/8" Grosgrain in Rich Razzleberry
Jewels:  Basic Pearls

I sponged the daisies with Rich Razzleberry and So Saffron then attached the three layers of the large daisy to each other and curled each layer to my liking.  I repeated the same step with two layers of the medium daisies and one layer of the small daisy. I attached it to the box with velcro, so it's relatively easy on and off.


Thursday, November 25, 2010

Pink Purse

See Buster...isn't he cute!?


BAD BUSTER!!!


Yup, this is the chapstick purse I bought from Glenda for my niece's b-day.  Well, needless to say, I had to make her a new one after Buster had fun with it.  Once again I used a video from France Martin to make the new purse. 
         http://www.frenchiestamps.com/2010/10/frenchies-freaky-friday-and-cute-6x6.html 
I just doubled the measurements she gave to make a bigger purse (12X12 DSP).  My daughter Rachel even made her a little coloring book to put in her purse. :)