Showing posts with label Winter Card. Show all posts

Friday, December 8, 2017

Day 3 of 12 Days of Deals with FSJ!

Day 3 of 12 Days of Deals!  
DI-0248 Ornamental Frames ~ Regular Price - $38.95, Sale Price $29.21.  
DI-0246 Snow Frames ~ Regular Price - $38.95, Sale Price $29.21.

Right now I only have one card to share with you using the Snow Frames Die.  I made this at my upline Glenda's Christmas stamp a stack earlier this month.  I'll be creating a card or two at my Winter stamp a stack using this die set.
This card also includes Snow Blooms Die Set as well (DI-0253 $14.95).  If you order that along with the Snow Frames Die there will be no additional shipping costs!
To order go to www.funstampersjourney.com/sarahoogendoorn

Thanks for looking and have a great day!
Sara

I'd love to have you join me on my journey!
Go to www.funstampersjourney.com/sarahoogendoorn or
Click on "Join My Team" at the top of this post.

Have you ever wanted to create something, 
but don't always have the time to come up with the idea?
That's where the Bloom Box comes in!  Check it out!  
www.funstampersjourney.com/sarahoogendoorn


If you like what you see and want to order just click on the 
"Shop Now" tab at the top of my blog. 

 If you have questions feel free to contact me. 
Just click "Contact Me" at the top of my blog . 

Supplies used on this card:

Sunday, December 25, 2016

Merry Christmas! A Fun Stampers Journey Card

Merry Christmas!  I hope you have all had a great day spending time with family and friends.  I know that I have.  As Christmas day 2016 is about to close for me I have one final Christmas card to share with you.  This is always a special card for me to make because my dad asks me to make a card for my mom that he can give her on Christmas day.  Since her favorite color is blue I always make that the dominant color.


This was another card that was hard to get a good picture of!  The watercolor is a bit more vibrant and the embossed notes aren't gray or super shiny like the pictures show.   My dad and mom both liked it so that's all that matters. :)  


I started by stamping Vintage Notes on watercolor paper using Clear Pigment Ink and embossing it with Journey Silver Embossing Powder.  However before I used my heat gun I used a kleenex to randomly wipe off some of the embossing powder.  I wanted the background to be there, but not be the dominant focal point.  Next I used my Color Splash watercolor pencils to create a colorful background.  After that I stamped two trees from the set Winter Holiday using a Journey Silver ink pad.  Have you seen all the snowflakes I've been putting on my Christmas cards lately?  I'm now down to just a few left.  A couple of these are a lot smaller than the snowflakes I earned for free as a Bloom Benefit.  That's because I broke a few of them when I was a little heavy handed and in a hurry putting them on other cards.  Did I throw them away?  NO WAY! lol  I broke the other parts of the snowflake off and made mini snowflakes! :D  


Thanks for looking and have a great day!
Sara

I would love to be your Journey Coach! If you are thinking about joining 
Fun Stampers Journey and would like to be a Journey Coach click 
"Join My Team". 
I'd love to have you join me on my journey!  

If you like what you see and want to order just click on the 
"Shop Now" tab at the top of my blog. 

 If you have questions feel free to contact me. 
Just click "Contact Me" at the top of my blog . 

Supplies used on this card


Stamp Sets:
Vintage Notes & Winter Holiday
Card Stock:
Pool Play, Brushed Silver, Whip Cream, Watercolor Paper
Ink Pads:
Clear Pigment Ink, Journey Silver
Supplies:
Color Splash Watercolor Pencils, Journey Silver Embossing Powder,
Pretty Flakes Accents, Cut Rhinestones

Monday, December 12, 2016

Frosty Fun ~ A Fun Stampers Journey Card

Are snowflakes blue?  Nope! But they are on today's card!  
This is another  December stamp a stack a card that I prepped for my ladies to make. :)


Who doesn't love a cute snowman?  And it can be a card for Christmas or someone's birthday...or a thank you or thinking of you.  Maybe a just because too.  Yup, it could be a card for a lot of occasions. :)


It looks like I layered four pieces of card stock, but I only have two layers plus a frame.  I popped up one of the frames, but you can't tell it in any of the pictures.


This was a pretty easy card to make!  I stamped the snowman using Black Licorice, blocked off the bottom part of the snowman so I could sponge a hill, stamped the snowflakes using Beach Ball, colored in the scarf and holly on the hat with reinkers and a blending brush, then assembled my card...whew, that was a long sentence! I also put on the pearls and stamped the sentiment on the front and one inside the card.  Easy as that! :) 


Thanks for looking and have a great day!
Sara

I would love to be your Journey Coach! If you are thinking about joining 
Fun Stampers Journey and would like to be a Journey Coach click 
"Join My Team". 
I'd love to have you join me on my journey!  

If you like what you see and want to order just click on the 
"Shop Now" tab at the top of my blog. 

 If you have questions feel free to contact me. 
Just click "Contact Me" at the top of my blog . 

Supplies used on this card


Stamp Sets:
Frosty Fun & Every Day
Card Stock:
Beach Ball, Beach Breeze & Whip Cream
Ink Pads:
Beach Ball & Black Licorice
Supplies:
Sponges, Blending Brush, reinkers, pearls

Saturday, December 10, 2016

Snow Buddy ~ A Fun Stampers Journey Card

Last week I posted a card with feathers on it and a couple of weeks ago I posted one with leaves on it.  Why am I telling you this?  Because both of those cards and today's cards are all the same card! Yup, the same card stock, just stamped with different images.  How fun is that?  


I needed five winter cards for this month's stamp a stack and I wanted to use something other than blue.  Don't get me wrong I love blue cards, but I needed a change of color.


I stamped the background stamp Vintage Notes lightly with silver, then added the snow flakes in gold with the stamp set snow buddy.  I also added "joy" just in case someone wanted to use it as a Christmas card instead of a winter card.  


For finishing touches I added a bit of silver silk, tied on some natural journey thread, added a snowflake from the bloom benefit Pretty Flakes Accents and pearl in the middle of the snowflake.


Thanks for looking and have a great day!
Sara

I would love to be your Journey Coach! If you are thinking about joining 
Fun Stampers Journey and would like to be a Journey Coach click 
"Join My Team". 
I'd love to have you join me on my journey!  

If you like what you see and want to order just click on the 
"Shop Now" tab at the top of my blog. 

 If you have questions feel free to contact me. 
Just click "Contact Me" at the top of my blog . 

Supplies used on this card


Stamp Sets:
Snow Buddy, Vintage Notes & Holiday Script
Card Stock:
Dark Roast, Oatmeal Cookie, Black Licorice & Buttercream
Ink Pads:
Journey Gold & Journey Silver
Supplies:
Pretty Flakes Accents, Pearls, Naturals Journey Thread

Tuesday, October 11, 2016

Snow Globe ~ A Fun Stampers Journey Card

I don't have a lot of Christmas stamps right now, but this one comes from Fun Stampers Journey and was a Bloom Benefit out of their Journey Holiday Mini Catalog that ended in September.  Since we're all about holidays right now over at Try Stampin' or Not on Tuesday I thought the globe would be perfect to use with their sketch. :)


Here is this week's sketch.  Make sure you check out all the other great cards made using it HERE.  We'd love to see what you create if you get a chance to play along!  We're also doing some fun things for the month so make sure you check out what's going on.


You can see lots of shimmer on this picture of the card!  


Not quite as much shimmer on this one, but every picture turned out differently.  To create the sparkling/snowing globe I colored it in with Journey Color Splash watercolor pencils, then used a little bit of glue over the globe and covered it with Journey Sparkle Dust.


Thanks for looking and have a great day!
Sara

I would love to be your Journey Coach! If you are thinking about joining 
Fun Stampers Journey and would like to be a Journey Coach click 
"Join My Team". 
I'd love to have you join me on my journey!  

If you like what you see and want to order just click on the 
"Shop Now" tab at the top of my blog. 

 If you have questions feel free to contact me. 
Just click "Contact Me" at the top of my blog . 

Supplies used on this card:


Stamp Sets:
Snow Globe (retired)
Card Stock:
Cool Pool p. 288 (CS-0018) $6.95
Banana Cream p. 288 (CS-0087) $6.95
Black Licorice p. 289 (CS-0003) $6.95
Whip Cream p. 289 (CS-0040) $6.95
Ink Pads:
Cool Pool p. 288 (IP-0074) $7.95
Black Licorice p. 289 (IP-0041) $7.95

Supplies:
Journey Color Splash Watercolor Pencils p. 28 (JM-0078) $59.95
Journey Sparkle Dust p. 306 (AC-0013) $5.95
Details Pro Shears p. 273 (TO-0063) $13.95

Tuesday, December 8, 2015

Beauty of the Season

I'm late!  I'm late! For a very important date!  Well I'm not really late for an important date, but I sure am late for my Try Stampin' on Tuesday post.  I logged on to check out our next sketch thinking I'd be working ahead a little bit only to find out I was LATE! Not sure how I missed it, but thankfully I created a card for my winter stamp a stacks that is pretty similar to today's sketch and the optional theme is snowflakes.  


Make sure you stop by Try Stampin' on Tuesday HERE to check out what the other designers created.  If you get a chance to play along we'd love to see what you create!


As you can tell I used a retired stamp set and retired framelits.  Sometimes it's just nice to pull out some of the older stuff I have and see what I can create with them, especially when it comes to making Christmas cards.  I used to make the same one for everyone, but that isn't the case anymore.  It's nice to have a variety to send out. :)


Thanks for looking and have a great day!
Sara

I would love to be your demonstrator! If you like what you see and want to order anything just click on any of the products that I've listed at the bottom of my blog or click on the "Shop Now" tab at the top of my blog. Any of them will take you directly to my website! If you have questions feel free to contact me. Just click "Contact Me" at the top of my blog . If you're thinking of becoming a demonstrator click "Join My Team". I'd love to have you join me!

Tuesday, November 24, 2015

Updated Picture Tutorial of Watercolor Wonderland

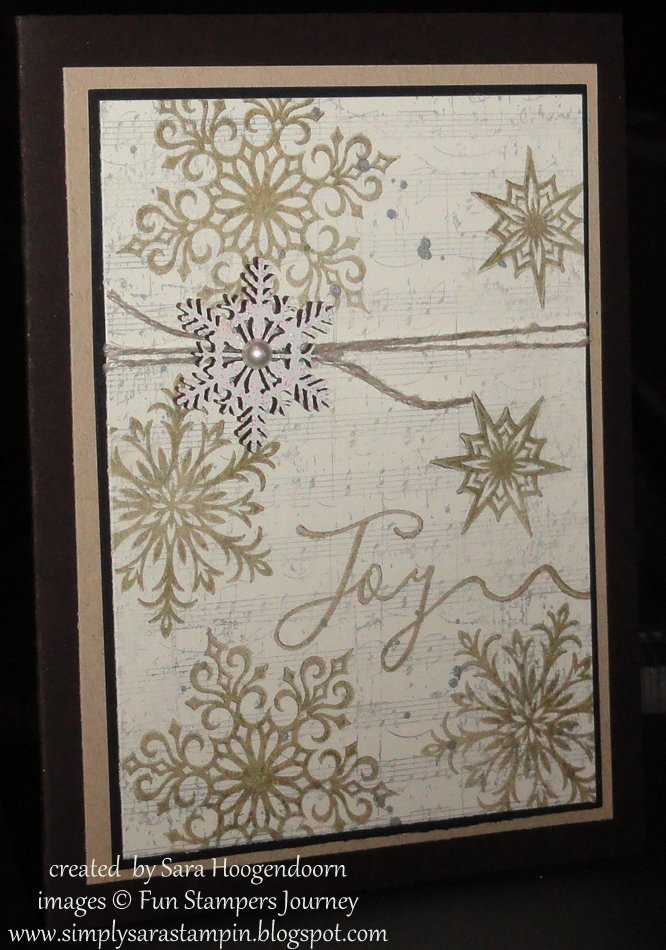
Since 'Tis the Season is running for three weeks because of Thanksgiving I created another card to go with our sketch.  My other card was pretty clean and simple.  This card is clean but was not quite as simple!  


I've really enjoyed seeing other creative ladies post card after card of beautiful water colored scenes, so I've been trying my hand at it off and on lately.  Since I'm a Stampin' Up! girl I've had to learn to make things work using their inks.  I'm ok with that, but I have a feeling if I ever try water coloring with water color paint or other stamping products it's going to be a lot different! 


Head over to 'Tis the Season HERE to check out all the fun Christmas cards created with this sketch.  If you get a chance we'd love to see what you create!  Plus it's not too long and you'll need to be sending out your Christmas cards...yikes!!


I think this card makes a good masculine Christmas card and I already have someone in mind that I'll be sending it too. :)


Thanks for looking and have a great day!

Sara

I would love to be your demonstrator! If you like what you see and want to order anything just click 
on any of the products that I've listed at the bottom of my blog or click on the "Shop Now" tab at the top of my blog. Any of them will take you directly to my website! If you have questions feel free to contact me. Just click "Contact Me" at the top of my blog . If you're thinking of becoming a demonstrator click "Join My Team". I'd love to have you join me!


Updated Picture Tutorial


I made three samples this time around as I was trying to make this tutorial.  I took picture of two of them and you'll see all three at the end (but not on finished cards).


I started with a piece of 140 lb. watercolor paper cut to size and taped the edges of the piece to a folded piece of paper towel.  I use tape to give the picture a  framed look, but don't always use it.  I think it's best to use painter's tape, but I didn't have any on hand so I used masking tape.


I used a sticky note cute to shape on my first sample to start my first hill.  Sorry it's so blurry!  None of the pics turned out of thise! :(  I used my aqua painter and wet the top panel. I wanted it pretty wet so the ink would flow easily.


I started with Pool Party, then added Night of Navy while it was still wet.  You can see that I pulled off the panel at this point while it was still wet.  I don't know why, but if you do that do it carefully if you want to keep your clean line.


This is the second sample I made.  I didn't use a sticky note panel, but instead just wet where I wanted to put my sky.  The shape is similar to my first panel.  


I started with Pool Party and took a picture before I added in more color. :)  This shows you how wet my watercolor paper is!


While the Pool Party was still wet I added Night of Navy.  I dabbed it in and let it spread on its own.  I added more Night of Navy as I needed to make it a little darker.

I waited for both of my samples to dry completely (or I might have used my heat tool to dry it faster!).  Once it's dry put your sticky note back on so you can start stamping your trees. You can see just a little gap between the sky and sticky note.  I did this because just that little extra layer of paper makes it so you can't stamp right on the edge because it bumps up a little.  It makes sense once you try it if you don't know what I mean! ;)  I used the trees from the set Wonderland and inked them with Old Olive and Mossy Meadow classic stampin' pads.  Sometimes when I stamped I used both colors on the stamp at one time and sometimes I just used one or the other color.  Once the stamp was inked I spritzed it a couple of times with water.  I wanted the trees to bleed a little once I stamped them (I wanted them to look like they were watercolored even though they were stamped!).  


I reinked the pad, spritzed it and stamped again until I had the amount of trees I wanted.


This is my second sample.  Even though I didn't have a sticky note when I did the sky I did cut one to fit my shape before I stamped my trees.  Notice I don't have the space like I did on the first one and the tree farthest to the left doesn't go all the way down...it's floating! lol  That's what I was trying to explain earlier about leaving a bit of a gap.


Back to the first sample.  I didn't take pics of the steps on this one, but as you can see I added a lot of color.  I started with Pool Party and added in a touch of Night of Navy.  You can see that I added a bit more Night of Navy under the trees while the paper was still pretty wet because it bled downward. The second sample below shows the steps a little more.  Just keep in mind each picture you paint is going to be unique!


You can block off the bottom (I did in the first sample, just didn't show it).  In the second sample you can see where it's wet because it's shiny, but I didn't block it off.


I started with Pool Party again.  As you can see I applied more color at the bottom of the hill. And of course it doesn't look like I have a pic of when I added in some Night of Navy.  Just add it in wherever you'd like.  For the most part I let it do it's own thing.


Sample number one again...Once your watercolor paper is completely dry it's time to add in some more trees.  It's basically a repeat of everything we've done so far.  Cover up the bottom with a sticky note, ink up your stamp, spritz it with water and stamp it on your card (I have another floating tree down there! lol)  Do this until you have enough trees or you're sick of doing it. ;)


Same sample as above, but I've added a little more blue to the sky.  I really like how my original card has a big difference in the sky.  I wanted to add that same look to the rest of my samples.  They sure did turn out differently!  You can see that I hit the top of most of my trees and they started to bleed when I tried it.  Don't let that bother you...it is supposed to have that watercolored look, plus it makes it unique.  
You can also see that I've wet the bottom of the card so I can add my last little hill.  And of course I've already blended Pool Party and Night of Navy on the paper.

Back to the second sample.  If you remember from earlier you see that I've only added Pool Party on the hill.  Now you can see that I've added in Night of Navy too.  I needed the floating tree to get back on the ground too so I used Night of Navy to help me with that. Right now the whole painting doesn't look very nice, but with the trees added on it will be just fine. :)  You can see I've added a sticky not once again before I added the trees.  I had to cut a little notch in this one because my water bled a little out of my original lines, but I went with it.


I've added my trees and the little tree fits perfectly into the notch. :)  And once again I forgot to take a picture, but I went ahead and wet the bottom part, then added Pool Party and Night of Navy.  
Once your painting is completely dry you can carefully peel of the masking tape...remember carefully! :)

Here are all three samples that I made.  The bottom two are the ones I showed my steps with and the top one is the final one I made.  I love that they're each unique and yet similar. :)  


One little trick I do to make them flat again if they warp is to run them through my big shot using an embossing folder.  Instead of putting it inside like I normally do, I put it under the embossing folder between the two plates.  Works like a charm every time! :)  I hope you enjoyed my picture tutorial!  If you have any questions just let me know and I'll try to answer them if I can. :)

Sara

Supplies used on this card:


Built for Free Using: My Stampin Blog