I have a lovely rose card to share with you today that was inspired by one of my rose bushes and created for the Creative Team Application for Fun Stampers Journey. :)
 Today I'm also sharing a picture tutorial (there will also be a video at the end to check out if you'd like). I did masking and used FSJ's Pan Pastels...love them! So soft and creamy and easy to use! Plus they are 20% off this month!
Let's create!
Stamp the main image using Black Licorice True Color Fusion Ink onto a piece of Whip Cream card stock measuring 3-7/8 x 5-1/8". Mask the rose and stamp the stem.
 Mask the stem, then stamp the leaves.
 Mask the three leaves and stamp more leaves.
 Pull off the masks.
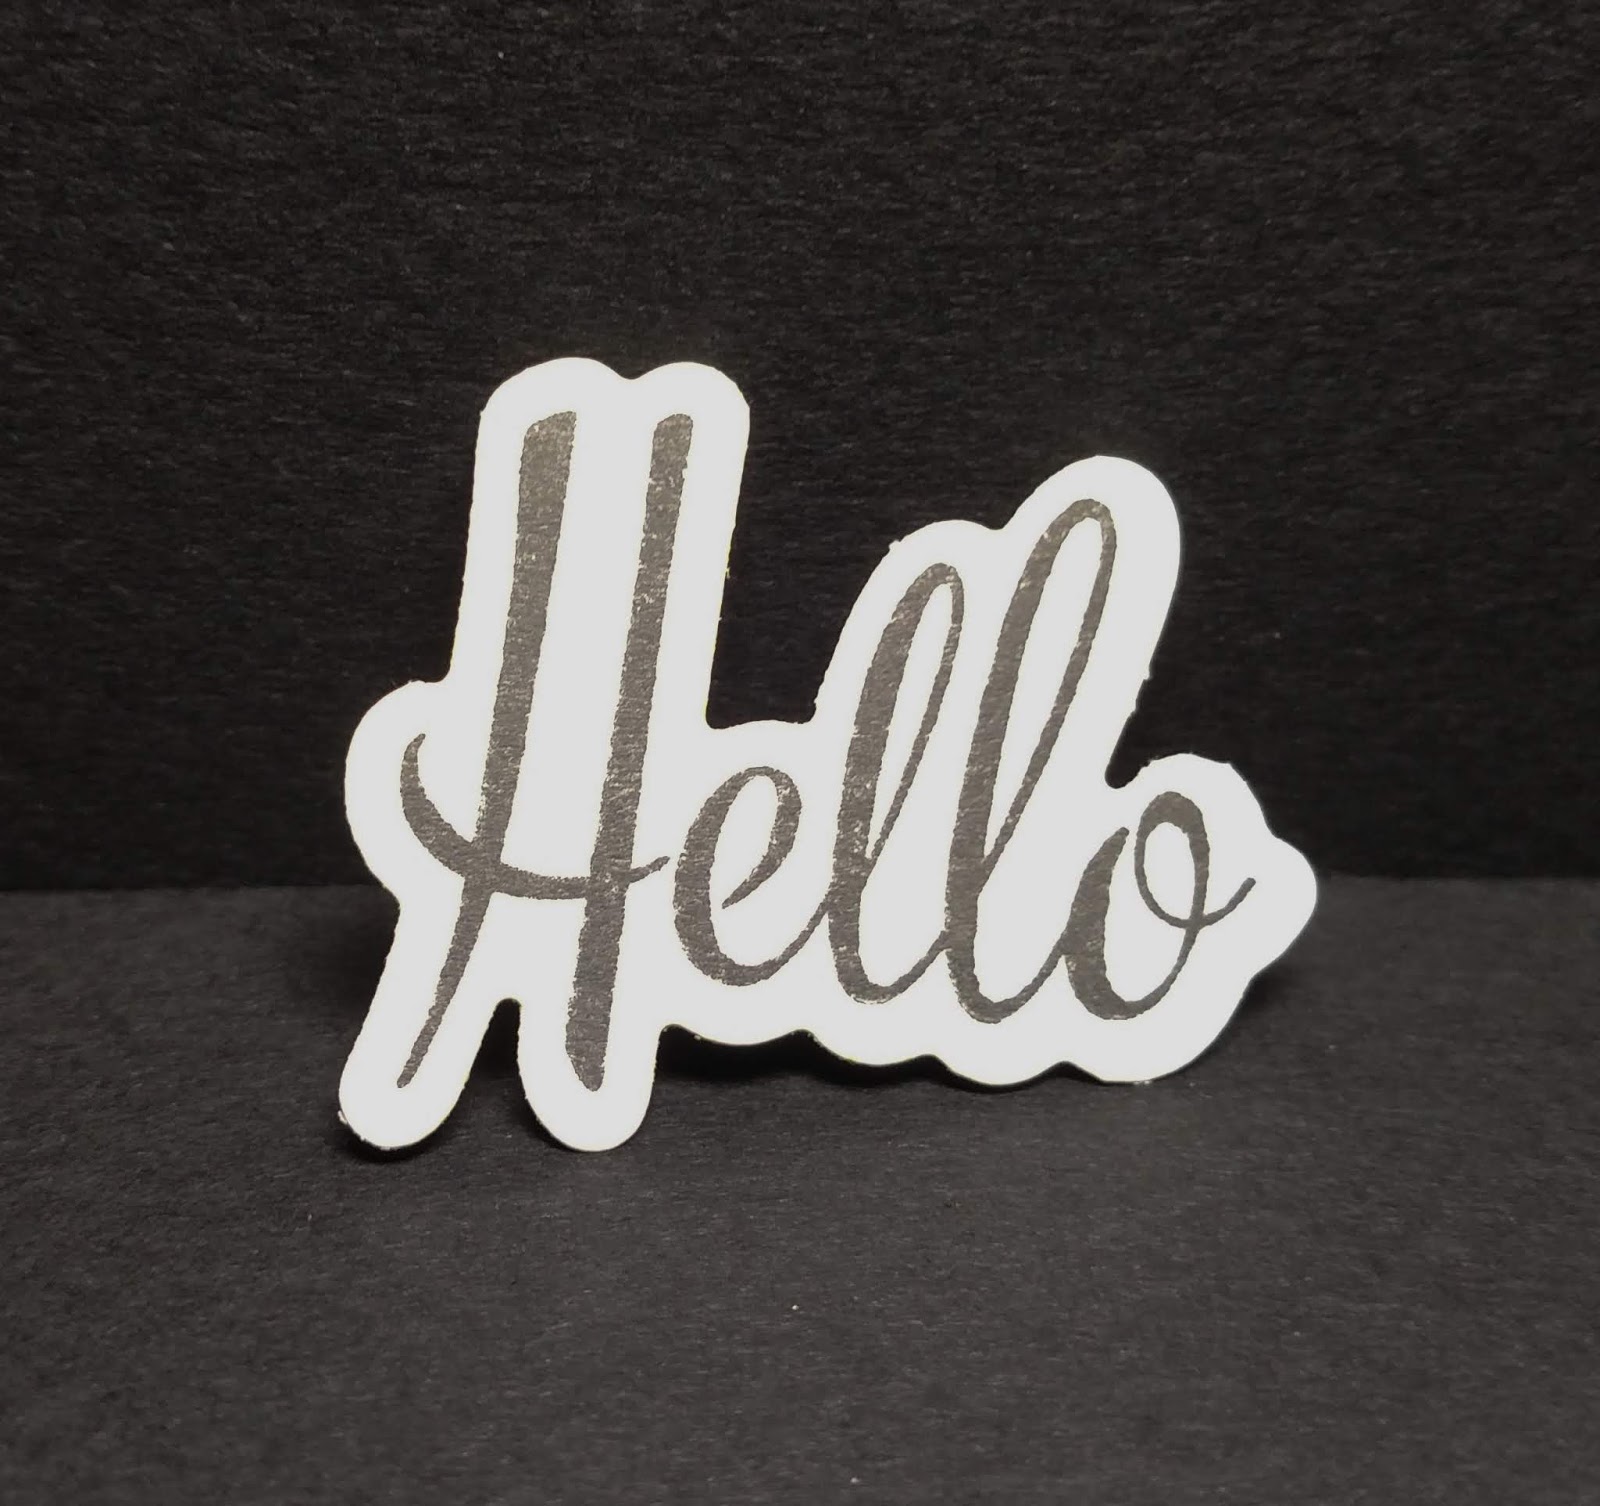
 Stamp "Hello" and fussy cut or die cut.
 NOTE...if you have oily fingers do NOT be touching the card stock all over! Your finger prints will stick out like a sore thumb!
 Add Lemon Drop to all of the petals. It will be darker than what the Lemon Drop Pan Pastel actually is because it's mixing with the Sweet Berry.
 Go back over the dark areas again with Sweet Berry.

 Add Limeade Splash to the leaves leaving them lighter along the inside edges.
 Add Green Olive over the dark areas of the leaves.
 Add a touch of Fresh Forest on the leaves.

 Blend and pull the color out and around the flower and leaves. Add more Beach Breeze as needed to get the color you desire.
 Spray with aerosol hairspray to set the color. Do not forget this step! Yes, it curls the card stock, but once dry you can bend it back into shape.

 Mask the flower again. Using a sponge, dab color onto half of the stamp Graduated Dots. I used the side with smaller dots.
 Flick with Black Licorice Silk.
 Take off the masks and you have a lovely colored rose.


Let's create!
Stamp the main image using Black Licorice True Color Fusion Ink onto a piece of Whip Cream card stock measuring 3-7/8 x 5-1/8". Mask the rose and stamp the stem.


Brush and dab Sweet Berry Pan Pastel in all of the dark shaded areas of the rose.


Go over the petals again with Lemon Drop and blend gently together.


Add Beach Breeze into all of the shadow areas.


For shimmer add 70% rubbing alcohol into a mister and add 7 or 8 drops of Sparkle Silk. Spritz the card stock. Set aside to dry or if you're in a hurry use your heat tool to dry it.


To complete card put a piece of 4 x 5-1/4" Black Licorice card stock under the main image. Add Special Day Organza Ribbon and tie a knot on the front. Add Medium Foam Squares on the back of the Black Licorice card stock and attach it to the Whip Cream card base that is 4-1/4 x 11" and scored at 5-1/2". Attach the "Hello" using glue dots...whew, you're done!

Whip Cream
Sweet Berry
Lemon Drop
Limeade Splash
Green Olive
Fresh Forest
Beach Breeze
Pool Play
Black Licorice

I hope you enjoyed creating with me!

Here's the Video I promised...
Thanks for looking and have a great day!
Remember all products used are listed at the bottom of each post. :)
Sara
I'd love to have you join me on my journey!
Go to www.funstampersjourney.com/sarahoogendoorn or
Click on "Join My Team" at the top of this post.
 Have you ever wanted to create something,
Go to www.funstampersjourney.com/sarahoogendoorn or
Click on "Join My Team" at the top of this post.

but don't always have the time to come up with the idea?
That's where the Bloom Box comes in! Check it out!
 www.funstampersjourney.com/sarahoogendoorn
If you like what you see and want to order just click on the
That's where the Bloom Box comes in! Check it out!

"Shop Now" tab at the top of my blog.
If you have questions feel free to contact me.
Just click "Contact Me" at the top of my blog .
Supplies used on this card:
Aerosol Hairspry, 70% Rubbing Alcohol, Post-it Notes (sticky on the whole back).
Aerosol Hairspry, 70% Rubbing Alcohol, Post-it Notes (sticky on the whole back).

No comments:
Post a Comment
Thank you for your comments. I read everyone! If you ever wonder how I've made something I'd be glad to let you know! Sara